Wave Function Socks

Hello, crafty friends!

(Re-)Introduction

We have a lot of new subscribers here on the website, so I wanted to take a moment to welcome everyone who is just joining us. (Seriously, every time I get a notification that I have a new subscriber, I have a little \*squee\*.) I’m Amanda, and I am an aspiring professional knitter and knitwear designer in my free time. In my not free time, I am lucky to be a stay at home mom for my two children. You’ll see that a lot of my patterns are science-inspired. I earned a Ph.D. in chemistry (many) years ago and spent (many) years teaching college students how to safely work in the laboratory and how to draw organic reaction mechanisms. Now I get to apply all of my skills to crafting and keeping things semi-organized for my kiddos and amazingly supportive husband, @Technicool_Dad. I am lucky to get to volunteer at the kids’ school and to take them to all of the soccer practices and art clubs, and of course, car line pick up is one of my favorite activities — getting to see their smiling faces first thing after school is just the best feeling.

Pattern Inspiration

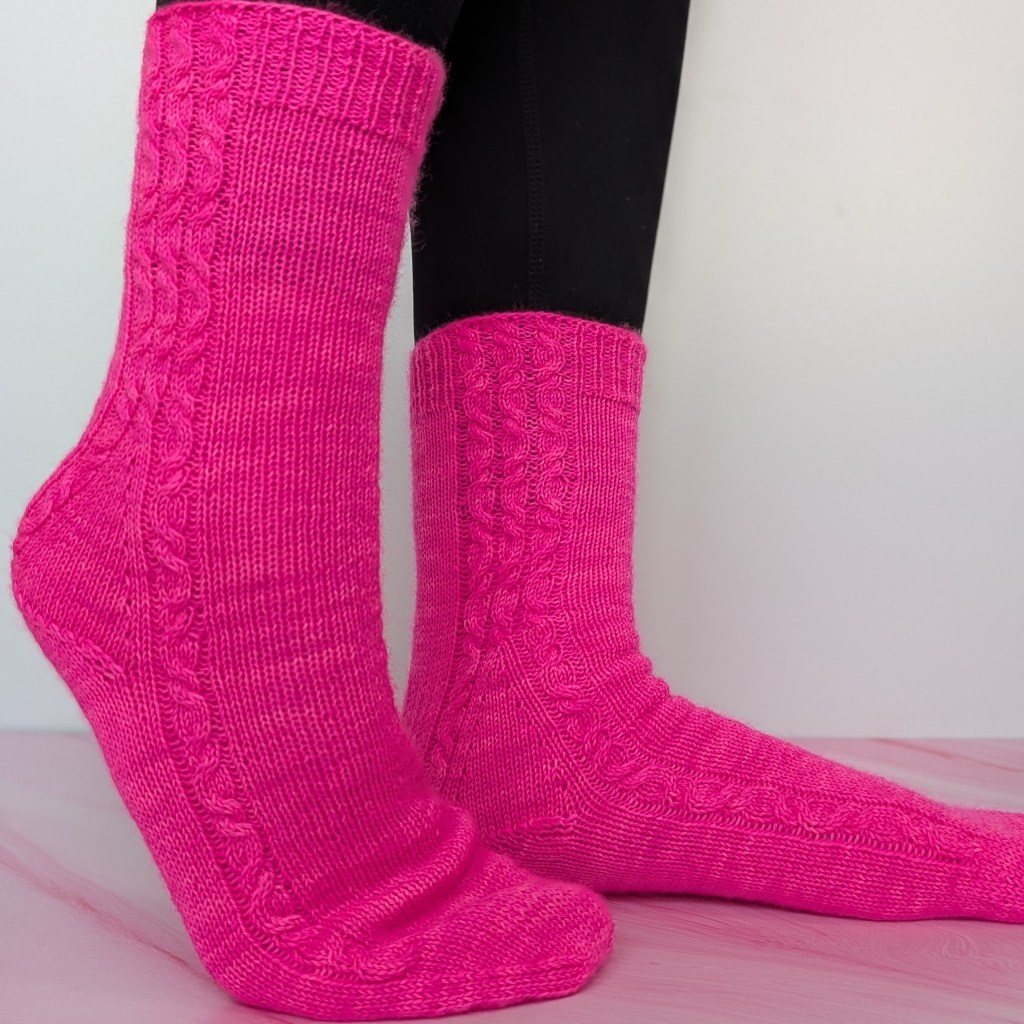
Today I am so excited to share that my newest pattern, the Wave Function Socks, has finally been published! When I took physical chemistry in college, quantum mechanics was one of my favorite topics. It was all math and functions and complex formulas, and my brain just loves a good problem. The wave function of a particle describes a few things, including the probability of a particle’s location being in a specific place. My friends and I liked to make jokes about how parts of our wave functions were vacationing on the beach — admittedly, this was a very low probability, but we thought we were funny and clever.

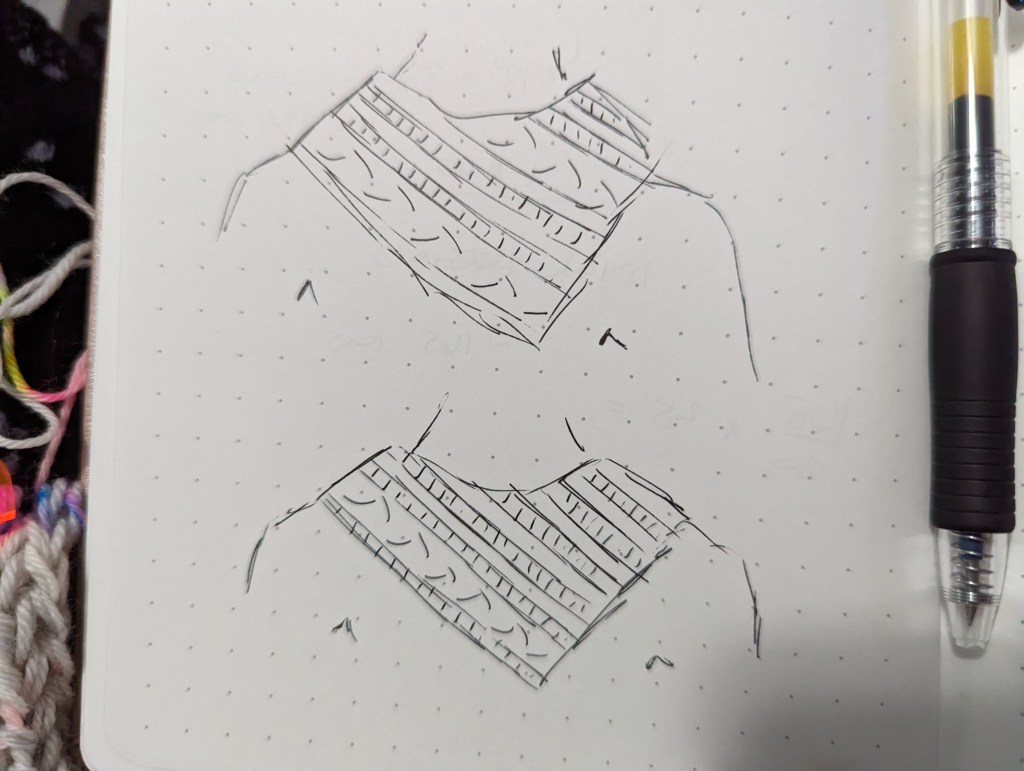
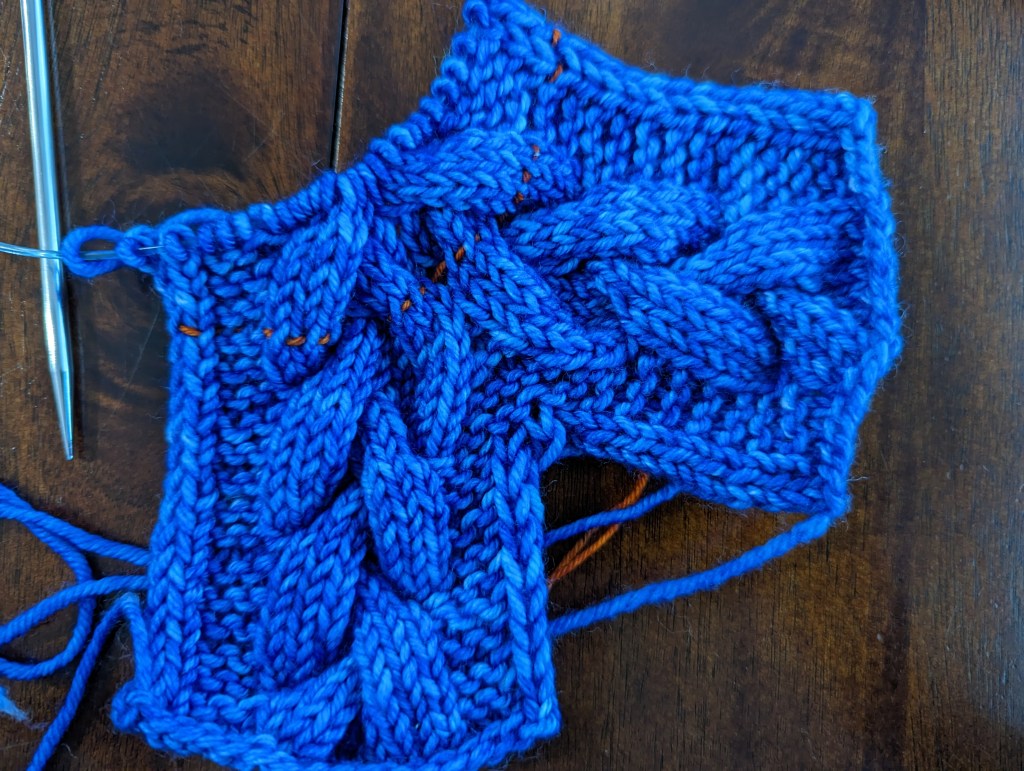
The Wave Function Socks presented a few good design challenges that I was keen to tackle. The first problem I tackled was determining the perfect formula for cable spacing so that the waves would be visible both on a sock blocker and when worn. After many swatches, I think I ended up with the perfect wave cables! For these socks, I really wanted to have the cable panels centered on the sides of the sock instead of on the instep, and for the cables to transition neatly to the foot and the heel. To accomplish this, I created a modified Strong Heel. This variation features slip-stitch reinforcement where your socks rub against the back of your shoe, and the symmetric increases on the side allow the cables to gracefully flare out over the ankle. Best of all, we have a look and fit similar to that of a heel flap and gusset, but with no picking up of stitches.

The Wave Function Socks feature an easily memorized pattern that will allow you to take them on the go or allow part of your mind to wander off on its own wave function beach vacation. Carefully placed increases and decreases mean that you don’t have to debate which size to knit — just cast on for your normal size!

The pattern will play nicely with any fingering weight merino/merino nylon blend yarn in solid, tonal, lightly speckled, gradient, or low-contrast colorways. The pattern has been tech edited and test knit and is all ready for you to cast on!

Coupon Code!

Thank you so much for subscribing to my newsletter! Please enjoy 50% off of the Wave Function Socks pattern now through August 8th with the code TECHNICOLORMOM.

Design Process Spotlight: Dilution Cowl

I was participating in a general cowl knitalong (KAL) with my local yarn store, Eat.Sleep.Knit, in early 2023 when the idea for the Dilution Cowl came to me. I was originally choosing colors for a different cowl project by one of my favorite designers – one where you hold a strand of DK weight yarn with a strand of fingering weight yarn, but alternate out the fingering weight yarn to create a marled fade. I made several swatches and could never settle on a good fade using only stash yarn. Eventually, I realized that I needed to choose something different because I felt like I was forcing the colors.

I loved how the DK weight yarn diluted out the speckles of the fingering weight yarn, and after I found a pair of yarns from my stash that I loved together, I knew I had to make something really special with it and started sketching. An asymmetric shawl is my favorite shape to knit for a shawl, and when this yarn spoke to me, I knew it wanted to be a cowl that had that same asymmetric shape. I wanted it to have a cable that was featured on the front and to have an interesting but easy texture for the drapey part of the cowl.

The earliest sketches of this cowl just had the cable along one side, and I just started knitting. This literally flew off my needles and was only slowed down by me stopping to take photos to share with a friend and admire my work. Do you do that? Stop to gaze lovingly at your knitting or crafting? If not, you should totally try it! Be impressed with yourself! You are creating something amazing!

Now, as I approached the length that I wanted the neckline to be, I started to think about how I wanted to finish off the live edge. I considered a simple i-cord bind off, and while I think that would have looked really nice, I decided to try something crazy and attempt an applied edging, where you knit an edging perpendicular to the body of the fabric. The idea was that I’d try to make the cables meet at the corner, but if I couldn’t make it work out, I’d just overlap them and call it a day. Usually I don’t put a lot of pressure on myself to just finish and prefer to figure it out, but I was on a relatively short deadline for the cowl KAL that I wanted to submit the project for. After several hours on the floor with a notebook, a calculator, and a measuring tape (which my children call “measuring snakes”), I ended up with a tentative plan.

I did not get the corner right on the first try. I got down to where I was ready to start intertwining the cables and started taking very meticulous notes. After the first attempt failed, I realized I needed to switch to a swatch so that I wouldn’t wear out the yarn with multiple frogging and reknitting attempts. I am a problem solver, though, and I just knew that I could solve this problem if I stuck with it. It took me about three tries to get it right, and let me tell you, I was just over the moon with pride at how clever I was when I did.

Once I had a good idea of how the corner was going to go, I switched back to the main project, finished out the corner, blocked the fabric, and seamed up the back, and there it was, the Dilution Cowl! I just love how this project turned out.

The last time I had published a pattern before the Dilution Cowl was in late 2019, so I was a little nervous about putting this design out into the world, but I’m so glad I did! Once I got back into the swing of things, I managed to publish seven patterns in 2023. Some of my design processes have been much more intentional than how the Dilution Cowl design process went, and some of them have just been the kind where I start knitting and see where it takes me. I can’t say that I have a strong preference for one over the other, but the laissez faire type definitely seems magical.

If you love the texture and cables in the Dilution Cowl, check out the Concentration Shawl, the Solution Socks, and the Solvation Hat. I’m also in the process on working on a baby blanket version where the cables go all the way around the perimeter of the blanket, and let me tell you that figuring out how to do the corners and cables on that one was even more satisfying than finishing up the corner on the Dilution Cowl. (That one took about seven tries, and I ended up with a whole pile of swatches.)

What do you think? Do you ever start knitting a project with a yarn and realize that the yarn wants to be something else? In a way, I think this is very similar to an author whose characters start taking them in a different direction than the author originally intended. The yarn is a character, and sometimes it needs its own adventure!